|
Dear Filmmakers,
The following article is an example of the
kind of content I intend to create more of once my new web site is up, sometime in 2015. If you like this kind of information,
please subscribe to my mailing list--there will be plenty more of this to come!
Best,Mark |
| |
| | | by Mark Stolaroff, December 2014 |
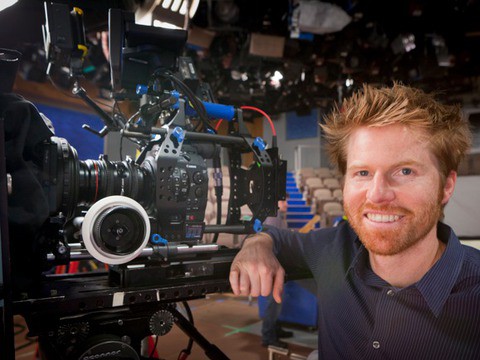
| | For those of you who didn't get a chance to attend Filmmaker Alliance's recent seminar, Demystifying The Camera, presented by SNL resident DP Alex Buono, (pictured) I wanted to give you the highlights of what you missed. This presentation
was so good--from Alex's affable and articulate delivery to his outstanding Keynote slides--that I felt the need to summarize
it into an article of my own. (And as someone who regularly designs Keynote slides for my classes, I have to admit, I was
a little jealous!) |
| | I've seen "technical"
presentations like this before and most of the time, when the audience is made up of filmmakers, (especially no-budget filmmakers),
rather than DP's, I’ve felt these lectures have missed the mark. It's one thing to know what the terms mean
and what these cameras can do; it's another to know what relevance they have to all of us, especially when you're
working on a particular type of project with few resources. It does us no good to hear you have to shoot with the best camera
you can get your hands on, or that 12 bit is better than 10 bit. We can all assume that the bigger number is better, right?
But does 12 bit really make a difference? Is it going to be worth the extra hassle and expense to get 12 bit? What is the
extra hassle and expense of 12 bit? (And what the hell is 12 bit, anyway??). These are the essential questions that Alex
helped answer.
If you're not familiar with Alex's work, check out some of his films on his
blog. I would start with The Beygency, since this is the first clip he showed us. This short film was shot in ONE DAY!!
You see, the timetables on these shorts are so tight, that often they have only a day or two to shoot and then they are doing
the editing, f/x and grading all at the last minute. In some cases, the East Coast feed will get an unfinished film and the
West Coast feed will get the final version. When you're working under these conditions, you don't have time for perfection;
you're more in the position of figuring out what works. And if something gets the job done--and the audience likes it--it
works. This is the position I have always taken with no-budget filmmaking. If you've taken my class, you know one of
the ideas I teach is "Sometimes, good enough works well enough." This is obviously a little more complicated than
it sounds, but the general idea is you don't have the luxury to make everything perfect. You have to figure out what
is most important to making your film work, concentrate on those elements first and foremost, and then let other production
values work well enough. Often--almost always--little camera things like bit depth are not important at all to the overall
end result of your project. Without even knowing what your no-budget project is, I can tell you that 95% of the time, things
like story, performances and production sound are going to be your most critical elements. Color subsampling, not so much.
It's important to note that Alex has been shooting these spots for
about 15 years. He's used an incredible variety of cameras over that time, starting with film cameras, moving into DV
cameras, then finally ending up with many of the cameras no-budget filmmakers are using today, like the 5D and 7D DSLR's,
C100, C300, REDs, Sony F3's, Alexas, and more. He made it clear that he is a big fan of the Canon 5D Mark II, which he
used to shoot the previous SNL Title Sequence in 2009, as well as many other pieces. He's also a big fan of the 7D, which
he said worked well in tight spaces, in low light, and even worked shooting against a green screen, which he'd done several
times, (more on that in a bit).
Ok,
with that in mind, here is a recap of what Alex covered in his presentation... |
| | | Cinema Camera Features
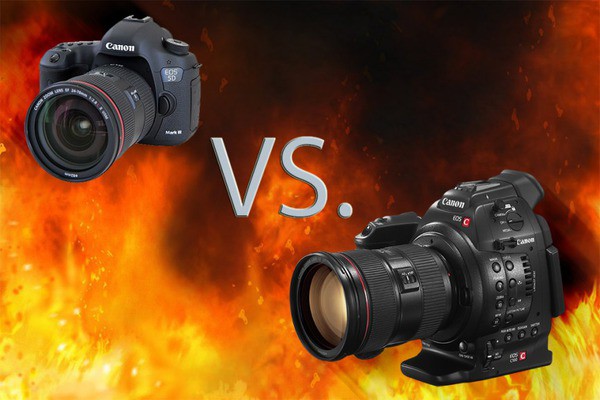
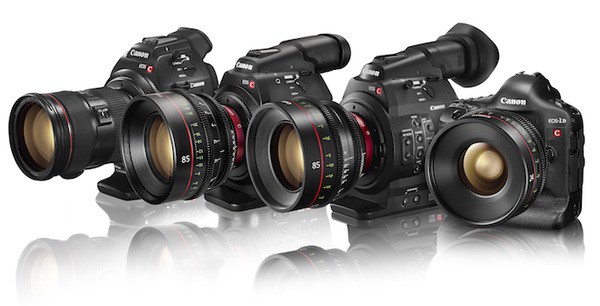
Alex remarked that he
was a huge fan of the newish Canon 5D Mark III DSLR ($3,400). He said you can get a remarkable image from this camera,
especially considering its relatively low cost, (and the Canon 7D, another favorite, is only around $1.5k). If that were
true, then why would you want or need to step up to a dedicated video camera, like the Canon C100 ($4.5k) or C300 ($12k)? (It must be said that this presentation was held at the Canon Technology Center, so he spent a lot of time talking about Canon cameras, which he clearly likes, though this discussion could easily
be applied to a conversation about most any high quality DSLR and the dedicated cameras from Sony, Panasonic, etc. (With
one more caveat--some DSLR's by other companies offer some of the high-end features not found on Canon DSLRs--I'm
thinking of the Panasonic GH4, for instance, but that's another discussion)).
Back at the dawn of digital video cameras, the features
and advancements offered by manufacturers each year were game-changer, must-have improvements. I remember when we were first
offered Mini-DV over analog Beta SP; then it was PAL Mini-DV, to approximate the frame rate of film; then it was 16:9, to
approximate the aspect ratio of the cinema; then it was true 24p on an affordable camera, (that was mind-blowing); then it
was affordable HD, then 24p HD on solid state media; then finally, 24p HD with a large sensor. That was it; we’d achieved
the look of film, (high res, 24 frame progressive, shallow depth-of-field--right out of the box), with a camera just about
anyone could afford: the Canon 5D Mark II. |
|
| So, what does the Canon
C100 have that the Canon 5D doesn't, and is it important to you? First, it has
XLR inputs. These allow
you to plug professional mics right into the camera so you don't have to use an external recorder and thereby don't
have to sync the audio later in post. Again, working quickly (and if you were working with a tiny crew), this feature could
make a crucial difference. If you were shooting on weekends, however, like the Layover folks did, this feature becomes perhaps less important. Shooting with the 5D, they used
an inexpensive Zoom recorder to record audio, and had all week to sync the footage, (most likely with a program like
Plural Eyes).
The C100 has timecode, which
can be very helpful in those situations where you are using double system sound (recording audio with an external recorder).
You pretty much need a smart slate to take advantage of timecode for syncing purposes. If you are shooting with multiple
cameras and recording dialogue, timecode can be extremely useful. |
| | The C100 has a waveform
monitor. Alex quickly explained how a waveform monitor works, showing an example. He said a quick glance at the waveform
monitor gave him real-time feedback about what his exposure was. If he was moving quickly, he could glance at the waveform
monitor instead of having to use his light meter. Essentially, the waveform monitor shows you where your exposure values
are for a scene. Areas above 100 will be blow out; areas at 0 will be black; skin tones should fall at about 70.
The C100 has built-in ND filters, (neutral density), which are useful for shooting in bright exteriors. The camera
also has the Zebra Stripe feature, which is another way to quickly determine if you
are overexposing your image.
The C100 has a Log gamma option. This is always
a hard one to explain, but essentially shooting log allows you to get more dynamic range out of your image in post. The important
thing to note about shooting log is, if you don't really have a decent colorist (or the money to pay a decent colorist),
or the time to grade your material, then you probably shouldn't be shooting log. Log images look flat and blown out and
they have to be graded to get the desired effect. If you do have a colorist, then
this can be an incredibly useful feature, and he showed several examples of what they were able to do in post to different
images, getting some amazing looks out of this camera. Again, I can't emphasize enough--if you can't afford a colorist,
don't shoot log. Or if you can't afford the extra steps in your workflow that are required to manage log, don't
shoot log. It can be a big pain in the ass, (I've been there and I know!). The C100 also has another high dynamic range
option called Wide DR gamma that gives you a higher dynamic range, but without the
need to grade in post.
The C100 has a Peaking function that helps you find
critical focus, (this is one of those features that the Panasonic GH4 has that the Canon folks kept off their DSLRs). Like the newer Canon DSLRs, the C100 also has Dual Pixel Auto Focus, which he said works really well in certain situations. If you are following a subject
with a steadicam, this is a perfect situation for this feature. If, however, you have an extreme composition, where perhaps
your subject is off to the edge of the frame, this feature isn't ideal. He made the point that if you're using cine
lenses, (which are manual lenses), you can't use this feature, (more on lenses below). |
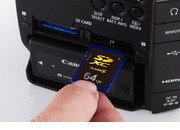
| | The C100 has dual card slots,
which allows you to not only shoot longer, but you can hot swap cards and shoot continuously. If you're shooting a documentary,
for instance, this might be a critical feature. Or if you're really run and gun, and shoot with two 128GB cards, you
can shoot over 10 hours of footage without swapping cards. That might be your whole day, without having to bother downloading
a card. You can also shoot in Dual mode, which records on both cards at the same time--instant backup.
Alex noted that the C100, C300 and
5D were all pretty close in weight, with the heaviest of the three, the C300, weighing
only 3.2 lbs. The Alexa is a much heavier camera, (around 14 lbs), which might make a big difference in certain shooting
situations. |
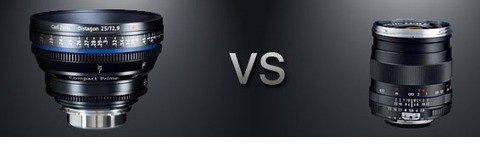
| | Lenses. He briefly
broke down the difference between using still lenses for these cameras and cine lenses. He said that Canon made some incredible still lenses, but that the reason you would want to use
cine lenses was for focus. Yes, you can use the auto focus feature with an EF still lens, including the new Dual Pixel focus
system, but you would get a more organic result with a manual cine lens. These lenses were designed to pull focus and you
can make very small focus adjustments with relatively big turns, which makes effective manual focus pulling possible, with
one caveat--that you were using a focus puller, (usually your 1st AC). If, on the other hand, you were working by yourself,
he said it was easier to pull focus using the still lenses and perhaps the auto focus features. |
| | | Other Digital Camera
Attributes
Color Subsampling. Alex went through the origins
of color subsampling, (which is a form of image compression), explaining how scientists figured out that the human eye could
determine changes in brightness much better than changes in color, so if you were trying to reduce the bit rate or the amount
of information in a video signal, to save space and to transmit easier, you were better off cutting down the color information
rather than the brightness information. This is expressed by the familiar 4:X:X designation, where the first number 4 denotes
luminance bandwidth and the other two numbers denote color bandwidth, with 4 being full bandwidth. A camera like the Alexa
or the Canon C500 is capable of recording 4:4:4, which is full color, giving you all the color information. This is especially
useful in a color grading suite or when you are trying to pull a key with a green screen. The C300 shoots 4:2:2, which is
half the color information. This is a pretty common color profile and works really well most of the time. The 7D and C100
shoot 4:2:0, which is a quarter of the color information. Now, this might sound like a huge problem, but if you weren't
pushing things too hard in color correction, (if you shot your scene pretty close to what you wanted your end-result to be),
4:2:0 works remarkably well. In other words, it looks good enough and likely no one will be able to tell the difference.
He also reminded us that he had even shot green screen with these 4:2:0 cameras. He said you had to really light the green
screen carefully to make it effective, but if you did, it could work. If you were shooting a lot of green screen, then it
was way easier (and faster) to pull a key with 4:2:2 or 4:4:4--it was much more forgiving when you were pulling your key.
In this discussion he veered
slightly to discuss a broader point--one that I like to discuss in my class. He said that colorists are always complaining
about what you're giving them, but he suggested to mostly ignore a colorist's complaints. He said there are so many
things that you have to get done on a shoot and most of those are more important than giving your colorist perfect footage
to grade. This is that key point about looking at your shoot from a big-picture perspective. A colorist is only looking
at that one thing; you have to look at everything and pick your battles wisely. |
|  |
Bit Depth. Bit depth
refers to the number of shades of color per color channel, (you have 3 channels: Red, Green, Blue). Cameras like the C100
and C300 shoot 8 bit, which is 256 shades, or a total of 16 million colors. That sounds like a lot of colors, and it is,
until you compare with 10 bit (like the C500) or 12 bit (like an Alexa). 10 bit is 1024 shades or 1 billion colors and 12
bit is 4096 shades, or 70 billion colors! Now, as you might expect, there are tradeoffs to having all those colors, the first
being that only expensive cameras are capable of 10 bit or 12 bit, and second, that the file sizes get bigger the higher the
bit depth. So, do you notice the difference between 16 million colors and a billion? Alex said in most situations, you won’t,
and 8 bit is fine. A typical situation where you would notice is shooting a blue sky. An 8 bit camera can’t capture
all the subtle shades of blue in a blue sky, so you will see banding in the image. So, the solution is to know what your
camera is capable of and where it will come up short and try to avoid shooting situations where you’ll notice a lessor
camera’s weaknesses. |
| | Compression. Compression is
the familiar way we think of cameras squeezing an image down to make the file size smaller. Not to get too technical, (and
believe me, he didn’t, which was refreshing), the less expensive cameras generally use more aggressive compression than
the more expensive cameras. A 7D, for instance, compresses the image using the h.264 codec; the higher-end C100 uses AVCHD;
the C300 uses MPEG-2; and the C500 uses RAW. The way I like to think about compression is through bit rate and whether or
not it’s interframe or intraframe compression. Interframe compression looks at a series of frames, say 15 frames, and
compares the difference between frames and compresses accordingly. Intraframe looks at each frame individually and compresses
them irrespective of the adjacent frames. The great thing about interframe compression is you can get a great, lossless image
at a lower bit rate than intraframe, though traditionally, intraframe is easier to edit, since your computer processor doesn’t
have to work as hard assembling discrete frames from the GOP (or Group of Pictures, or series of frames) needed to do the
compression with interframe. These days, newer systems can do that math, but editors prefer intraframe and often productions
shooting with a highly compressed interframe compression like h.264 will immediately transfer to a high-quality intraframe
codec like ProRes. Alex mentioned that ProRes ranks somewhere in between MPEG-2 and RAW in terms of quality, and of course,
there are different flavors of ProRes, with different color subsampling rates. The beauty of these cameras is you can record
to external recorders and get better subsampling and ProRes. He mentioned the Atomos Ninja Blade and AJA Ki Pro Mini as two of the more popular external recorders. He said a C100 with a recorder was capable of recording 4:2:2 ProRes, making
it on par or better than a C300. He also mentioned that both the C100 and C300 output clean HDMI into these recorders. It’s
important to note that these recorders add expense, but also make things faster in post. |
| 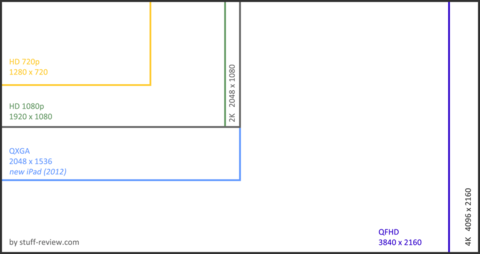 |
Resolution.
Alex spent some time talking about image size: 1080 (HD) vs. 2K vs. 4K. He mentioned that 2K (2048 × 1080) is
just slightly more resolution than HD (at 1920 x 1080); essentially it’s 6% wider than HD. HD is 16:9, (like everyone’s
TV set); 2K is NOT. So, if you’re shooting for mainly a TV or computer screen, shoot HD; 2K is really only necessary
for a wider theater screen, (to approximate the traditional 1.85 aspect ratio of cinema; 16:9 is 1.78). The same general
idea applies to the two different versions of “4K”--Quad 4K (or Ultra HD, 3840 x 2160), which is 4 times larger
than HD and 16:9; and Full 4K, (4096 × 2160), which is a little wider than 16:9 and designed for a movie theater. So
again, if you’re shooting 4K for TV, shoot Quad 4K.
SNL often shoots 4K now using the C500, recording onto
a Gemini Recorder in 4:4:4, (now discontinued). Other popular 4K recorders are the Codex, the Odyssey 7Q, and the AJA Ki Pro Quad. The C500 outputs a 4K RAW image, which produces files that take up 1TB per hour of footage! RAW is not video, it has to
be processed into a video file--an extra step--using DaVinci Resolve. Using a Ki Pro Quad, however, you’re able to
convert the RAW to ProRes 4K automatically, (which is only 700GB/hour), and eliminates a step in post. The editor on SNL
gets a 2K proxy and they screen ProRes HQ HD, though the master stays in 4K ProRes.
4K
or 2K? A big question people ask these days: is it necessary to shoot 4K now? He mentioned that the two reasons
to shoot 4K were 1.) to future proof your work; and 2.) to give you the ability to reframe shots when you’re publishing
in 2K. He pointed out that these two reasons were mutually exclusive--you had to choose one reason or the other. He demonstrated
the advantage of being able to reframe a shot, showing interview footage from a documentary feature he’s been working
on. Shooting with one 4K camera, (and publishing to 2K), he was able to “zoom in” on a subject in post for dramatic
emphasis at certain key moments in the interview, giving him a close-up shot, created after the fact.
Alex went
through the typical workflow for one of their shorts, but it’s not necessary to cover that in any depth, since their
situation is so specific--usually shooting at the very last minute and having to color and edit at the same time to make the
airdate.
He also mentioned using the new Movi camera stabilizer and compared it to a traditional steadicam, saying that the steadicam was still the best solution for the
typical walk-and-talk move, while the Movi was great in other situations.
|
|  |
I asked him how he was able to get such incredibly good-looking
images in so little time and presumably with a small-ish budget—what was the secret sauce? He said it was production design. He said good production design probably accounted for about 50% of why the image looks so
great. So, it’s important to know that a good looking image is part lighting, part camera, and a big part what you’re
shooting.
If you ever get a chance to see Alex do this presentation in person, do check it out. I’ve only
tried to summarize it here, and without all the great visuals he created for his slideshow. I was glad to see that his overall
attitude about cameras jibed with mine--there are a lot of great cameras out there that can do the job, and many of them are
really inexpensive. It’s important to know what the job is--what’s expected of your camera--before you make your
pick. I’ll add to that a key element of successful no-budget filmmaking: build your story around the camera that you
can afford to use. Don’t write a story that requires you shoot with the top-of-the-line camera; design your story for
the aesthetic that you can afford to create. And really, know that the audience is very forgiving. They don’t know
or care that you shot with a RED Epic in 6K. Give them a great story and you can shoot with just about anything.
|
| | | Connect with Me and Other No-Budget Filmmakers
Not a member of my new Facebook
Group? What are you waiting for?? Join today:
Follow
Me on Twitter:
Like No
Budget Film School on Facebook: |
| | Copyright
© 2014 Mark Stolaroff. All rights reserved. |
| |
ARCHIVED EDITIONS OF THE NO BUDGET REPORT:
|